
During the 1990s the Environmental Protection Agency (EPA) estimated that 2 billion disposable razors were thrown away each year in the US. Since then, the US population has increased by 25%.
This is just an estimate for the USA. Imagine how many more billions are sent to landfill each year around the world.
That’s an awful lot of single-use waste. But let's not focus on the problem. What is the solution?
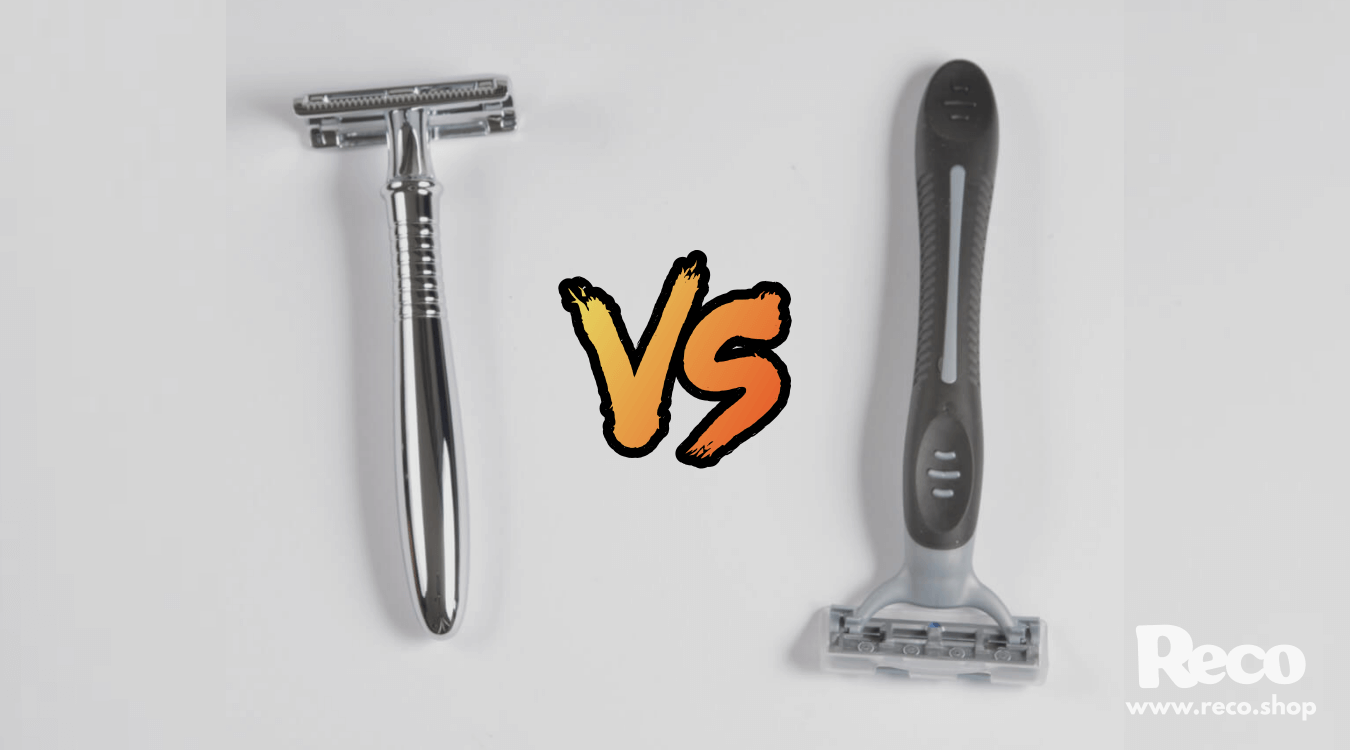
Ironically, the answer lies in our recent history. We need to look at traditional shaving methods. Those that existed before the invention of plastic. I'm talking about the double edge safety razor.
In this plastic free shaving guide, we run through everything you need to know about the eco-friendly safety razor. Where they came from, how to use them for a great shave and how to maintain them.
If you want to jump ahead, use the clickable table of contents.
The double edged or "DE" safety razor was invented late in the 19th century. But it wasn’t until King Camp Gillette launched his version in 1901 that their popularity skyrocketed.

Gillette's innovation was to add a thin metal blade in the razor that could be replaced when blunt. Before this, safety razor blades needed to be resharpened. A specialist task that required a professional.

All was well in the shaving world until British based Wilkinson Sword had a bright idea. They embedded a razor blade in a throw away plastic cartridge.
Not to be out done, the French company Bic created an entire razor that could be disposed of after use! Yeh thanks Bic.
To keep ahead of each other manufacturers started a bizarre razor blade arms race. Trying to outdo each other by shoving more and more blades into a single razor.
As the number of blades increased, so did the parodies of this comical marketing practice. Here's one of my favourites I found from the 1990's taking the mick out of a 16 blade razor.
The funny thing is, we aren’t too far away from a 16 blade razor. A Korean manufacturer called Dorco has released a 7 blade razor.

At first glance safety razors can look intimidating but they are actually quite straightforward.

Here is a side on diagram of our eco-friendly safety razor. There are four main components; cap, blade, guard and handle.
Sandwiched between the cap and the guard is the disposable razor blade.
By twisting the handle, the cap, guard and handle come together. This causes the razor blade to gently curve and create the perfect angle for shaving.
Let's break down each part of the process. First, place the cap on a flat surface.

Drop the razor blade in the center of the cap.

Add the guard on top of the blade.

Finally screw in the handle and you are ready for your plastic free shave.

Here are some of the things to love about a safety razor:
1. Eco-friendly - If cared for, a good safety razor can last a lifetime. Replacement razor blades are made from thin sheets of stainless steel and can be easily recycled after use.
Many types of razor blades are sold in small cardboard boxes. The individual blades being wrapper in paper.
The end result is a minimal waste and plastic free approach to shaving. Compared to heavily packaged disposable and cartridge type razors.
2. Saves you money - Once you buy an eco-friendly safety razor, replacement razor blades are peanuts.
One blade will last you between 4 to 6 shaves. A pack of 5 blades costs around £3. If you shave every 4 days, over a year, it will cost about £11 in replacement blades.
Compare that with a years supply of Gillette Fusion 5 ProShield razors. Using the same assumptions, it will set you back c.£76 a year. Even cheap disposable razors like the Wilkinson Sword Xtreme will cost about £15 a year.

3. A close shave - Years of multi-million pound advertising campaigns and celebrity endorsements have conditioned us to think that to get a close shave you need MORE blades.
In fact all this does is expose your skin to more chance of irritation. Multiple blades tug and pull the hairs out of the follicle. Leading to the hair being cut too short and causes ingrown hairs and razor bumps.
As with all things there are some downsides to using a safety razor:
1. Learning curve - As with any new skill there is a small learning curve to get comfortable with a safety razor. The most important thing to remember is the head of the safety razor doesn’t have a hinge and you are responsible for adjusting the shaving angle.
Don't worry though, we go through everything you need to know in the how to section.
2. Longer shave - Multi-blade razors do have one thing going for them. The more blades means more chance of cutting hair. With a single blade it can take a couple of passes to get a really close shave.
This is the bare minimum to get you started:
The star of the show. However the sheer volume of choice can make choosing a single razor rather daunting. So let's make things easy for you.
Our Reco 3R safety razor is up there with the best and a great eco-friendly starter razor. It provides an excellent shave at an incredible value.
We will get into the detail later but the key to shaving with a safety razor is to not apply pressure. Our Reco 3R razor is one of the heaviest on the market, coming in at 100g. The weight makes it extremely easy to get a close shave with gravity doing the hard work.
A critical component to a shave. But also a personal one. It's hard to tell you which blade will work for you because there are so many factors at play.
That’s why when people start shaving with a safety razor they buy a sample pack of blades. Trying each one in turn until they settle on a favourite.
Watch out though. Many razors blades are sold in small plastic containers and are wrapped cellophane.
The Astra Superior Platinum razors blades that we stock come in small cardboard boxes. With the blades wrapped in paper.
No matter which type you use they do three important things; lubricate hairs, make the hairs swell and desensitize the skin.
Which type you use is broadly down to personal choice. Let's run through each of them:
Shaving Soap comes as a solid block, just like a bar of soap. Compared to other methods it takes a bit more water and effort to generate a lather.
The major benefit is that they don't need much packaging. In fact, our own Reco shaving bar only has a simple wrap, made from recycled cardboard.
For a plastic free shave, shaving soap is the number one choice.

Shaving creams are soft and frothy. This makes producing a lather easier than a soap and you can apply shaving creams directly to your face.
Due to their consistency, more packaging is needed. Most of the time this is plastic based but some do come in metal tins or glass jars.

What about canned Shaving Gel/Foam? - pressurised shaving gels and foams will get the job done, but their use is discouraged. They come in single-use containers made with a mix of metal and plastic which is difficult to recycle.
We've done the hard work for you. Our plastic free shaving starter box has everything you need to get started with a safety razor. It includes our Reco 3R safety razor, a shaving soap bar and 5 Astra razor blades.
The following aren't needed for your first plastic free shave. But if you want to take it to the next level try these additional items:

A shaving brush makes lathering and applying shaving soap a breeze. It also lifts the hair from the skin during soap application.
Traditionally, shaving brushes have been made from animal hair, specifically boar and badger.
The good news is that there are now lots of synthetic fibre based shaving brushes out there.
Apart from saving the animals, synthetic fibres are great because they don't absorb water. Meaning you can create a rich lather using a relatively small amount of shaving soap. They also dry quicker than natural fibers and are less sensitive to everyday use.

Shaving bowls are used as an aide to produce a nice rich lather. A dollop of soap and a dash of hot water is added to the bowl and vigorously whipped with a shaving brush.
There is nothing special about 'shaving bowls'. It's simply a container within which you create a lather.
Rather than buying something new why not use something from around the home. Such as reusing an old mug or an a unused soup bowl.

Apart from showing off all your awesome shaving gear, a rack serves a practical purpose. Hanging a shaving brush upside down after use is crucial to extending its life.
If you don't, water will pool in the handle and weaken the glue that holds the fibres together. Leaving you with a malting shaving brush.
All good things are built on solid foundations. Shaving is no different, set yourself up right and you will have a fantastic shave. Here are our pre-shave tips:
The warm water will open pores and soften your hairs, making shaving a whole lot easier.
In a hurry? Use a hot towel instead. Soak the towel with hot water and apply to the skin for 30 seconds.
It's really important to shave with the grain during your first pass with a safety razor. This means shaving in the direction of your hair growth. If you don't, it will likely lead to irritation and razor bumps.
Make a mental note of any areas where hairs grow in unusual directions. When you reach these trouble spots you can then approach them with more attention.
How you apply shaving soap is either a matter of personal preference or dealing with the kit you have.
Yet the aim is the same, creating a wet and creamy lather.
Add a dollop shaving soap or cream to your shaving bowl and a dash of warm water.
Starting whipping the mixture in a circular motion. It shouldn’t take long for it to start foaming up.
After about a minute that lather should be ready. You are looking for a lather that has the consistency of yoghurt. If it's to clumpy add more water, if it's watery add more soap.
Apply the lather onto your skin. Don’t force the brush, use the tips of the brush to paint the lather on. Make sure to get under the hairs as well.
If you only need a quick shave and don't have many days of hair growth this method works well.
Rub the shaving soap or cream in your hands or direct onto your face to create a lather. Make sure to cover and massage the whole area to be shaved and get right underneath the hairs.
If you have a brush but no bowl you can make a lather in your hand. Some people prefer this, so make a habit of changing your routine to see which you method you prefer.
Use a pre-shave oil - If you want a super close and slick shave or find that shaving can be uncomfortable, try a pre-shave oil.
The oil softens the hairs, making them easier to cut and reduces the chance of tugging. It also creates a smooth surface on the skin for the razor to glide over.
To use a pre-shave oil, apply a small amount to the skin and work into the hairs. This should be done before applying shaving soap. Wash the residue off by lightly splashing your skin with warm water.
Your pores have been opened, your hairs are lathered up and it's time for the main event. Here is how to get the perfect shave:
For the best shave the safety razor should be used at a 30 degree angle to your skin.

If you are struggling to find the angle try holding the safety razor cap against your skin like the diagram below.
Lower the handle until the blade is just touching your skin. That should be your 30 degree angle.

Notice that a safety razors design means that the guard, blade and cap should all be in contact with the skin when the correct angle is reached.
Use this as another reference point when trying to find that 30 degree angle.
At no point should you apply pressure when using a safety razor.
Safety razors are heavy compared to plastic disposable razors. The weight allows gravity to draw the blade down the skin.
You are simply there to guide the blade in the right direction. Let the blade do the hard work.
If you are struggling to stop yourself applying pressure try this tip - hold the razor handle with just the tips of your fingers and thumb.
This is where our pre-shave tip of checking hair growth comes in. For the first pass of any shave you need to make sure you are shaving with the grain.
This means that the razor blades should travel in the same direction that the hair is growing.
Once the first pass is complete you can then go across the grain or even against the grain for a super close shave.
Using shorter and slower strokes will make it easier to maintain a 30 degree angle. Remember, the head of a safety razor won't pivot like many disposable razors do, it's up to you to make sure the correct shaving angle is maintained.
As you become more comfortable with the safety razor you can increase the length of each stroke, while at the same time correcting the shaving angle.
Pulling your skin will get you a much closer shave but there are downsides.
With the skin under tension more hair will be exposed and more cut. When the skin in relaxed the hair will retreat under the skin and could lead to ingrown hairs and razor bumps.
After the first stroke of the razor the skin will no longer have any protection from the lather. Going over the same area again can lead to razor burn.
If you need to go over an area again remember to re-lather.
When you have finished your plastic free shave rinse your skin with cold water, this will help close your pores. Pat your skin dry and you are done!
We aren't quite finished though. Here are a few things you may want to do straight after your shave.
Shaving strips oils from the skin, it can also cause irritation for some people. Counter this with a post shave balm or oil to soothe the skin and give it back some of that lost moisture.
Cleaning your safety razor after use with help keep the razor blade sharp and it's just good hygiene!
A another big benefit of using a safety razor is that it is effortless to clean compared to disposable razors that have multiple blades.
You can take a safety razor apart and get into all the nooks and crannies to give it a thorough clean. Something you just can't do with a disposable razor.
When you feel the safety razor start to tug and pull on hairs it's time to change the blade. This normally happens every 4-6 shaves but it could be more often depending on how much of your body you are shaving.
If you don’t replace the blade it will lead to skin irritation and ingrown hairs, and you don’t want that.
A little trick is to keep a dice next to the razor. Rotate it each time you shave to keep track of how many times you have used the blade.
To prolong the life of your shaving brush it is vital that you dry the fibres after use. If the water drips down into the handle the glue will soften and your brush will start malting.
This is where a shaving rack comes in handy.
If you don’t have a rack, shake the brush to get the excess water out. Then run the brush over a towel to remove the remaining water.
Razor blades are made from stainless steel and recyclable. But, left loose, they can be a danger to those handling refuse.
The best thing to do clean an old food tin can and pop them in there. When full, crush the top of the can and twist the edges over to seal in the blades. That way they can't harm anyone.

Comments will be approved before showing up.